Hi everyone! Happy (much) belated New Year. Sorry I've been absent, but I've got some other things on my mind and have been busy. Busy for what you may ask? A wedding! That's right, Will and I are engaged. We are super excited. We've started planning for the wedding and I haven't made much time for trying new recipes. But the other day I decided I needed to get some baking into my schedule. So I grabbed my new King Arthur Flour Cookie Companion and started looking for some new recipes when I came across a recipe for blondies. Usually I would quickly turn the page because I'm more of a chocolate fanatic, but any recipe that calls for almonds catches my eye. So I added some cardamom and got to baking. These are amazingly delicious little treats. Super easy to make and they will quickly disappear. I don't even have a picture to share with you. Sorry about that. But please do make these blondies.
Scandinavian Blondies
Adapted from King Arthur Flour Cookie Companion
2 eggs
1 cup sugar
1/2 tsp salt
1/2 tsp almond extract
1/2 tsp vanilla extract
1/2 cup (1 stick) unsalted butter, melted
1/8 tsp ground cardamom
1 cup AP flour
Sliced almonds for the topping
1) Preheat the oven to 325 F and prepare an 8x8 square pan
2) Mix the eggs until thick then add the sugar and salt until combined. Add the extracts, melted butter, and cardamom. Then slowly fold in the flour until just combined
3) Pour into the prepared pan and top with sliced almonds and place in the oven
4) Bake for 30-35 minutes, or until golden
5) Let cool, then slice into 16 squares and enjoy!
Showing posts with label dessert. Show all posts
Showing posts with label dessert. Show all posts
Saturday, January 12, 2013


Thursday, December 20, 2012
Holiday Party 2012
Saturday was our 2nd annual Ugly Christmas Sweater and White Elephant Party. The house was filled with delicious desserts and horrendous fashion. It was a great time. I made classic gingerbread cookie, my pumpkin pie spice cookies, sugar cookies, stained glass cookies, and delicious glitter cookies. I was particularly excited to use my brand new 'A Christmas Story' leg lamp cookie cutter. This is my favorite holiday film and thought this was such a fun shape to make. Everyone had a great time. Little did I know that I'd be making chocolate cupcakes with peppermint buttercream a couple days later for another holiday get together.


This will be my last post for a little while. We're going out of town all next week for my birthday and Christmas. I'll have updates on all the delicious food we eat while we're in St. Louis. I'm excited to try some new restaurants. In the meantime here are some pictures from the party. I hope you all have a Merry Christmas and Happy Holidays!


Tuesday, December 18, 2012
French Lemon Cream Tart
When I came across this recipe by Dorie Greenspan I couldn't wait to get into the kitchen and start baking. Ever since I first made lemon curd I was amazed at how a few simple ingredients could be transformed into something so delicious. But of course, Dorie Greenspan, with some help from Pierre Hermé, took lemon curd to the next level. Instead of adding the butter at the beginning you first cook the lemon curd then pour it into a food processor, or blender, and slowly add the butter. By emulsifying the butter it turns the lemon curd into an amazingly creamy taste and texture. Wow. Move over lemon curd, this new method is taking your place. Top a crispy baked tart shell with this creamy lemon curd along with some whipped cream and I am amazed. This is a recipe that you have to try.
Tart Shell or pâte sablée
Adapted from Baking: From My Home to Yours
1 1/2 cups AP flour
1/2 cup confectioner's sugar
1/4 tsp salt
9 tbsp frozen (or very cold) unsalted butter, cut into tbsp
1 egg yolk
1) Place the dry ingredients into a food processor and pulse a few times to mix them together, then add the butter, being careful not to over process the dough, you want it to be sandy and have visible pieces of butter. The pulse in the egg yolk slowly then pulse for 10 seconds until everything is combined.
2) The dough will be very loose and you will have to work it together with your hands to form the dough, just be careful not to over-knead the dough.
3) Butter a 9-inch fluted tart pan and then press the dough into the pan, working up the sides to make sure the dough is evenly dispersed. If you have extra save some to fill in cracks if necessary after baking.
4) Place in the freezer for at least 30 minutes
5) Butter the shiny side of some foil and press it against the tart shell then bake in a 375 F oven for 25 minutes. Remove the foil and bake for another 8 minutes, you can bake it slightly longer, just be careful that it doesn't burn.
6) Remove from oven and let cool on a cooling rack until completely cool before filling with desired filling.
French Lemon Cream Tart
Adapted from Baking: From My Home to Yours
1 cup sugar
Zest from 3 lemons
4 eggs
3/4 cup fresh lemon juice
2 sticks plus 5 tbsp unsalted butter, cut into tbsp (room temperature)
1 fully baked tart shell
You will need a thermometer for this recipe
1) Add the lemon zest to the sugar and combine these ingredients to make a lemony sugar, rubbing the lemon oils into the sugar. Whisk in the eggs and then the lemon juice and place them in a double boiler over simmering water.

2) Cook the mixture, whisking constantly, until it reaches 180 F, it will thicken while it cooks, just keep whisking, this can take about 10 minutes
3) Once the mixture reaches 180 F take it off of the heat and pour it through a sieve, to remove the zest, into a food processor or blender and let cool to 140 F, then turn the machine on and slowly add the butter, about 5 tbsp at a time, you may have to scrape the sides down a couple times
4) After the butter is incorporated let the machine run for about 3 minutes to fully emulsify the butter and lemon mixture together

5) Pour the lemon cream into a container and press with plastic wrap and let cool in the fridge for at least 4 hours (this will keep in the fridge for 4 days). Just make sure it is airtight

6) Once the lemon cream is cooled you can then pour it into the cooled tart and let it set up for a few minutes. I like to add freshly whipped cream on top. Then slice and serve and enjoy!

Tart Shell or pâte sablée
Adapted from Baking: From My Home to Yours
1 1/2 cups AP flour
1/2 cup confectioner's sugar
1/4 tsp salt
9 tbsp frozen (or very cold) unsalted butter, cut into tbsp
1 egg yolk
1) Place the dry ingredients into a food processor and pulse a few times to mix them together, then add the butter, being careful not to over process the dough, you want it to be sandy and have visible pieces of butter. The pulse in the egg yolk slowly then pulse for 10 seconds until everything is combined.
2) The dough will be very loose and you will have to work it together with your hands to form the dough, just be careful not to over-knead the dough.
3) Butter a 9-inch fluted tart pan and then press the dough into the pan, working up the sides to make sure the dough is evenly dispersed. If you have extra save some to fill in cracks if necessary after baking.
4) Place in the freezer for at least 30 minutes
5) Butter the shiny side of some foil and press it against the tart shell then bake in a 375 F oven for 25 minutes. Remove the foil and bake for another 8 minutes, you can bake it slightly longer, just be careful that it doesn't burn.
6) Remove from oven and let cool on a cooling rack until completely cool before filling with desired filling.
French Lemon Cream Tart
Adapted from Baking: From My Home to Yours
1 cup sugar
Zest from 3 lemons
4 eggs
3/4 cup fresh lemon juice
2 sticks plus 5 tbsp unsalted butter, cut into tbsp (room temperature)
1 fully baked tart shell
You will need a thermometer for this recipe
1) Add the lemon zest to the sugar and combine these ingredients to make a lemony sugar, rubbing the lemon oils into the sugar. Whisk in the eggs and then the lemon juice and place them in a double boiler over simmering water.

2) Cook the mixture, whisking constantly, until it reaches 180 F, it will thicken while it cooks, just keep whisking, this can take about 10 minutes
3) Once the mixture reaches 180 F take it off of the heat and pour it through a sieve, to remove the zest, into a food processor or blender and let cool to 140 F, then turn the machine on and slowly add the butter, about 5 tbsp at a time, you may have to scrape the sides down a couple times
4) After the butter is incorporated let the machine run for about 3 minutes to fully emulsify the butter and lemon mixture together

5) Pour the lemon cream into a container and press with plastic wrap and let cool in the fridge for at least 4 hours (this will keep in the fridge for 4 days). Just make sure it is airtight

6) Once the lemon cream is cooled you can then pour it into the cooled tart and let it set up for a few minutes. I like to add freshly whipped cream on top. Then slice and serve and enjoy!

Monday, November 19, 2012
Apple Crumb Pie
Apples are an under-appreciated fruit in my opinion. Sure, you can buy them almost anywhere. And yes, sadly, the grocery stores only sell a few varieties. But for me they are one of the most versatile and delicious fruits. They are great to snack on anytime of the day and also make the most elegant desserts. Nothing beats a warm slice of apple pie, whether its for breakfast or for a late night snack, or anywhere in between.
When making apple pie I usually stick to my mom's recipe. But I was in the mood for something that took a little less time than making my own crust and was a little bit different. I found a recipe for an apple crumb pie made with an almond crumb crust by Martha Stewart. Yummy! This pie is delicious! The crust is almondy and crispy, while the apples are warm and tart. I even got to use my new apple peeler. Trust me, if you don't have one of these and you use apples a lot in cooking then you need to get one. They will make your life so much easier, especially around this time of year.

Apple Crumb Pie
Adapted from Martha Stewarts Baking Handbook
For the filling I used my mom's recipe
For the crust:
1 1/2 cups AP flour
1 cup plus 1 2 tbsp almond meal (or used ground almonds)
1/2 cup plus 2 tbsp sugar
1/4 tsp salt
1 1/2 sticks of butter, really cold and cut into small pieces
1) Whisk together all of the ingredients except the butter. Cut the butter into the flour mixture until it it is crumbly. Then with your hands squeeze the dough together until it starts to come together a little bit.


2)Press a little more than half of the filling into a 9-inch pie pan then freeze for 15 minutes.

3) Follow instructions for making the filling
4) Add the filling to the pie and then dot with a few tbsp of butter from apple pie recipe, then cover with remaining dough crumbs


5) Bake in a 350 F oven for about 1 hour, then let cool and enjoy!

When making apple pie I usually stick to my mom's recipe. But I was in the mood for something that took a little less time than making my own crust and was a little bit different. I found a recipe for an apple crumb pie made with an almond crumb crust by Martha Stewart. Yummy! This pie is delicious! The crust is almondy and crispy, while the apples are warm and tart. I even got to use my new apple peeler. Trust me, if you don't have one of these and you use apples a lot in cooking then you need to get one. They will make your life so much easier, especially around this time of year.

Apple Crumb Pie
Adapted from Martha Stewarts Baking Handbook
For the filling I used my mom's recipe
For the crust:
1 1/2 cups AP flour
1 cup plus 1 2 tbsp almond meal (or used ground almonds)
1/2 cup plus 2 tbsp sugar
1/4 tsp salt
1 1/2 sticks of butter, really cold and cut into small pieces
1) Whisk together all of the ingredients except the butter. Cut the butter into the flour mixture until it it is crumbly. Then with your hands squeeze the dough together until it starts to come together a little bit.


2)Press a little more than half of the filling into a 9-inch pie pan then freeze for 15 minutes.

3) Follow instructions for making the filling
4) Add the filling to the pie and then dot with a few tbsp of butter from apple pie recipe, then cover with remaining dough crumbs


5) Bake in a 350 F oven for about 1 hour, then let cool and enjoy!

Wednesday, October 31, 2012
Happy Halloween!
Halloween has always been my favorite holiday. I would go door-to-door every year until, well, let's just say I was probably way too old to go trick-or-treating. I don't even really like candy that much. Don't get me wrong, I love certain types of candy (mainly anything with chocolate and peanut butter) but for me trick-or-treating was always about the hunt. I'd grab a pillowcase from the linen closet and throw on my walking shoes and head out for a long and adventurous night. I didn't want to return home until that bag was full (or as close to it as I could get). When I returned home I would pour the contents onto the living room floor and take inventory of what I had received. I loved to see what the popular choices were that year and try and figure out why people still handed out those creepy plain orange wrapped "candies". What were those? I'm not really sure because I was too afraid to try. I would snack on a few of my favorite treats throughout the next couple of days, but I would inevitably hand over the collection to my dad (who has a real sweet tooth).
Now that I'm older and have left my trick-or-treating years behind me I bake my treats to share with my friends. And just as when I was a kid, one type of confection is never enough. So for the Halloween party this year I baked cookies, cupcakes, and cake pops in different flavors and many different decorations. For all of those who tried them at the party, I hoped you liked them! To those of you who didn't I hope you get some delicious treats tonight. Even if you have to sneak some from that giant bowl you left out for trick-or-treaters.


Now that I'm older and have left my trick-or-treating years behind me I bake my treats to share with my friends. And just as when I was a kid, one type of confection is never enough. So for the Halloween party this year I baked cookies, cupcakes, and cake pops in different flavors and many different decorations. For all of those who tried them at the party, I hoped you liked them! To those of you who didn't I hope you get some delicious treats tonight. Even if you have to sneak some from that giant bowl you left out for trick-or-treaters.


Monday, August 20, 2012
Chocolate Banana Ice Cream Pie
I love the combination of chocolate and bananas, whether they are baked into a delicious bread or frozen and put on a stick. Bluth Banana anyone? So when the other day I had a few bananas that had been sitting around for a little too long I decided to make some banana ice cream. Turning this ice cream into a pie didn't hit me until I had already made the base for the ice cream. I quickly looked up a recipe for a chocolate tart crust and got baking while the ice cream base chilled in the fridge. The great thing about Ice Cream Pies is that they can be made into almost any combination imaginable. I'm thinking of making a Cherry Ice Cream Pie with Almond Crust next time. This would also be great for summer birthday parties in place of a cake.


Chocolate Tart Crust
Adapted from The Martha Stewart Living Cookbook
1 1/4 cups all-purpose flour
2 tbsp cocoa powder
1/2 cup white sugar
1/2 tsp salt
6 tbsp butter, chilled and cut into small pieces
3 egg yolks, from large eggs
1/2 tsp vanilla extract
4 oz of baking chocolate or chocolate chips
1) Place flour, cocoa, sugar, and salt into food processor or blend with pastry blender to combine, then cut in the butter until it is crumbly then add egg yolks and vanilla and combine just until it holds together. Don't overwork the dough
2) Cover with plastic wrap and let chill for 30 minutes
3) Form dough into a disk and roll out until it is large enough to fit into a 9-inch tart pan (or if you are using smaller tart pans, shape accordingly), place in fridge, covered for 30 minutes
4) Blind bake the tart shell by placing a sheet of parchment paper over the shell and fill with pie weights, or dried beans, and bake at 400 F for 15 minutes, then remove weights and parchment and bake for an additional 12-15 minutes, making sure the crust doesn't burn
5) Remove from oven and let cool, then melt chocolate in double boiler and pour onto tart shell, covering all of the tart. Place in freezer to solidify the chocolate
6) When chocolate is hardened fill with your favorite ice straight out of the ice cream maker and freeze for at least 4 hours then enjoy!

Thursday, July 12, 2012
Strawberry Frozen Yogurt
Last week in Nashville had some record breaking heat. It was too hot to even make ice cream. That is how unbelievably hot it was. So instead, I decided to make some frozen yogurt. No heating involved. All you have to do is let the berries, sugar, and some vodka do their thing and mix in some lemon and yogurt and let it spin in the ice cream machine. So simple. And delicious. This frozen yogurt has that hint of tang from the yogurt, but the strawberry flavor comes through so clear that it almost tastes like a sorbet. I'll soon by trying this technique with some other fruits.
Strawberry Frozen Yogurt
Adapted from The Perfect Scoop
1 lb fresh strawberries, rinsed and stems removed
2/3 cup sugar
2 tsp. vodka (I used vanilla vodka) (optional)
1 cup plain yogurt
1 tsp. lemon juice
1) Slice the strawberries into tiny pieces and combine with the sugar and vodka and let sit for 1 hour, stirring occasionally


Strawberry Frozen Yogurt
Adapted from The Perfect Scoop
1 lb fresh strawberries, rinsed and stems removed
2/3 cup sugar
2 tsp. vodka (I used vanilla vodka) (optional)
1 cup plain yogurt
1 tsp. lemon juice
1) Slice the strawberries into tiny pieces and combine with the sugar and vodka and let sit for 1 hour, stirring occasionally
2) Puree the strawberries, in their juices, in a food processor with the yogurt and lemon juice until smooth. You can strain out the seeds, but I like the texture they add
3) Refrigerate until cold, then add to machine, freeze in freezer and enjoy!
Saturday, April 7, 2012
Rocky Road Ice Cream with Homemade Marshamallows
I've had a recipe for homemade marshamallows in my recipe box for some time now. An index card waiting to be read and covered in powdered sugar. Well the time for me to make these delicious treats finally came. With the arrival of my new ice cream maker I knew that I would have to make a delicious and indulgent version of Rocky Road ice cream. Always a childhood favorite of mine. Along with pistachio and mint chip. We used to go to Thrifty Ice Cream because you could get a cone for under a dollar and I loved the flavors of their ice cream, especially when I could get two flavors. I loved getting Rocky Road and finding the marshamallows and almond pieces stuck in the bottom of the cone.
I knew with my new ice cream maker I would have to make a more grown up version of this treat, which would require homemade marshamallows as well as some salted caramel sauce. Trust me, you only need a little bit of this ice cream. The base is a dark and rich chocolate layered with tiny homemade marshamallows, slices of almonds, and swirls of delicious salty homemade caramel. This may be the best ice cream ever. I adapted the recipe from Jenni's Splendid Ice Creams at Home. If you like ice cream I strongly recommend this book. The recipes are amazing and the pictures are beautiful. A great read and must have for ice cream lovers!
Homemade Marshmallows
Butter for coating pan
Powdered sugar for coating pan
2 tbsp gelatin
1/2 cup cold water
2 cups sugar
3/4 cup boiling water
1/8 tsp salt
1 1/2 tsp vanilla
1) Butter an 8x8 pan and coat with powdered sugar

2) Dissolve gelatin in cold water and whisk together using whisk attachment of kitchenaid
3) Whisk together boiling water, sugar, and salt in a pan for about 15-20 minutes until the temperature reaches 236 F. You will need a candy thermometer for this

4) Remove from heat and slowly pour over the gelatin and then add the vanilla

5) Beat on medium for about 20 minutes until white and thick


6) Add cooled marshmallow cream to the pan and spread out, then coat with plastic wrap and let sit at room temperature overnight

7) Coat a bench scraper or knife with powdered sugar and then slice marshmallow into desired shape and size. Toss cut marshmallows in powdered sugar so they don't stick together and enjoy!
Super Rocky Road Ice Cream
Adapted from "The Milkiest Chocolate Ice Cream in the World" in Jenni's Splendid Ice Creams at Home
If possible do use local and organic, high quality ingredients, it really makes a difference
1 cup whole milk
1 tbsp plus 1 tsp cornstarch
3 oz good quality dark chocolate (55-70%)
1/4 cup heavy cream
1 cup evaporated milk
2/3 cup sugar
2 tbsp organic light corn syrup (I try and avoid corn syrup as much as possible because of GMO's, but if you use organic you can avoid this issue)
1/3 cup unsweetened cocoa powder
1/4 tsp sea salt
Homemade marshmallows
Sliced almonds
Homemade Salted Caramel (Follow recipe for the caramel part only, not the frosting recipe)
Makes 1 quart
1) Mix 2 tbsp of the milk with the cornstarch to make a slurry and set aside

2) Chop chocolate into pieces and place in metal bowl

3) Fill a large bowl with ice water and water to make a water bath to chill hot ice cream mixture
4) Combine the remaining milk, cream, evaporated milk, sugar, and corn syrup in a 4-quart saucepan and bring to a rolling boil and add the cocoa and whisk. Boil mixture for exactly 4 minutes


5) Remove from heat and pour in cornstarch and milk slurry and return to heat and cook for another minute or so until thickened slightly
6) Add hot mixture to chopped chocolate and stir until melted then pour into a large freezer bag and submerge in ice water bath for 30 minutes


7) Pour ice cream base into ice cream maker and follow instructions for your machine, will take about 20-25 minutes until thickened

8) Add a layer of ice cream to a container then top with a layer of marshmallows, almonds, and salted caramel and repeat


9) Freeze until firm about 4 hours and enjoy!

I knew with my new ice cream maker I would have to make a more grown up version of this treat, which would require homemade marshamallows as well as some salted caramel sauce. Trust me, you only need a little bit of this ice cream. The base is a dark and rich chocolate layered with tiny homemade marshamallows, slices of almonds, and swirls of delicious salty homemade caramel. This may be the best ice cream ever. I adapted the recipe from Jenni's Splendid Ice Creams at Home. If you like ice cream I strongly recommend this book. The recipes are amazing and the pictures are beautiful. A great read and must have for ice cream lovers!
Homemade Marshmallows
Butter for coating pan
Powdered sugar for coating pan
2 tbsp gelatin
1/2 cup cold water
2 cups sugar
3/4 cup boiling water
1/8 tsp salt
1 1/2 tsp vanilla
1) Butter an 8x8 pan and coat with powdered sugar

2) Dissolve gelatin in cold water and whisk together using whisk attachment of kitchenaid
3) Whisk together boiling water, sugar, and salt in a pan for about 15-20 minutes until the temperature reaches 236 F. You will need a candy thermometer for this

4) Remove from heat and slowly pour over the gelatin and then add the vanilla

5) Beat on medium for about 20 minutes until white and thick


6) Add cooled marshmallow cream to the pan and spread out, then coat with plastic wrap and let sit at room temperature overnight

7) Coat a bench scraper or knife with powdered sugar and then slice marshmallow into desired shape and size. Toss cut marshmallows in powdered sugar so they don't stick together and enjoy!
Super Rocky Road Ice Cream
Adapted from "The Milkiest Chocolate Ice Cream in the World" in Jenni's Splendid Ice Creams at Home
If possible do use local and organic, high quality ingredients, it really makes a difference
1 cup whole milk
1 tbsp plus 1 tsp cornstarch
3 oz good quality dark chocolate (55-70%)
1/4 cup heavy cream
1 cup evaporated milk
2/3 cup sugar
2 tbsp organic light corn syrup (I try and avoid corn syrup as much as possible because of GMO's, but if you use organic you can avoid this issue)
1/3 cup unsweetened cocoa powder
1/4 tsp sea salt
Homemade marshmallows
Sliced almonds
Homemade Salted Caramel (Follow recipe for the caramel part only, not the frosting recipe)
Makes 1 quart
1) Mix 2 tbsp of the milk with the cornstarch to make a slurry and set aside

2) Chop chocolate into pieces and place in metal bowl

3) Fill a large bowl with ice water and water to make a water bath to chill hot ice cream mixture
4) Combine the remaining milk, cream, evaporated milk, sugar, and corn syrup in a 4-quart saucepan and bring to a rolling boil and add the cocoa and whisk. Boil mixture for exactly 4 minutes


5) Remove from heat and pour in cornstarch and milk slurry and return to heat and cook for another minute or so until thickened slightly
6) Add hot mixture to chopped chocolate and stir until melted then pour into a large freezer bag and submerge in ice water bath for 30 minutes


7) Pour ice cream base into ice cream maker and follow instructions for your machine, will take about 20-25 minutes until thickened

8) Add a layer of ice cream to a container then top with a layer of marshmallows, almonds, and salted caramel and repeat


9) Freeze until firm about 4 hours and enjoy!

Wednesday, November 16, 2011
Lemon Poppy Seed Bundt Cake
I've had a jar full of poppy seeds sitting on my spice rack for a while now. I'd never bought them before or ever baked with them, so they lay in wait of inspiration. Who knew that inspiration would be something so familiar, I couldn't believe I hadn't thought of it before. Lemon poppy seed bread. So simple, so light, and so fulfilling. I love the subtle hint of lemon that flavors this cake and the delicate crunch of the poppy seeds, adding the perfect texture to the soft bread. I made this cake for a breakfast meal, but I think I have been enjoying it at every meal: a snack after lunch, and a dessert after dinner. I think next time I will make a raspberry sauce to serve with it.
Lemon Poppy Seed Bundt Cake
Adapted from TLC Cooking
1 cup sugar
1 stick butter
1 egg
2 egg whites
3/4 cup milk (I used 2%)
2 tsp vanilla
2 cups flour
2 tbsp poppy seeds
Zest of 2 lemons
Juice of half a lemon
2 tsp baking powder
1/4 tsp salt
1) Preheat oven to 350 F and butter and flour a bundt pan
2) Beat sugar, butter, and eggs until fluffy, then add milk and vanilla until combined
3) Add in dry ingredients, poppy seeds, and lemon zest and juice

4) Pour into bundt pan and bake for 30-35 minutes, or until done
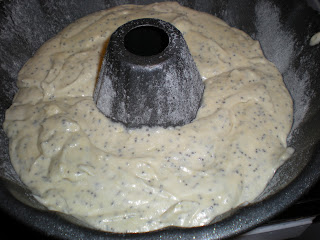
5) Let cool, then slice, serve, and enjoy!

Lemon Poppy Seed Bundt Cake
Adapted from TLC Cooking
1 cup sugar
1 stick butter
1 egg
2 egg whites
3/4 cup milk (I used 2%)
2 tsp vanilla
2 cups flour
2 tbsp poppy seeds
Zest of 2 lemons
Juice of half a lemon
2 tsp baking powder
1/4 tsp salt
1) Preheat oven to 350 F and butter and flour a bundt pan
2) Beat sugar, butter, and eggs until fluffy, then add milk and vanilla until combined
3) Add in dry ingredients, poppy seeds, and lemon zest and juice

4) Pour into bundt pan and bake for 30-35 minutes, or until done

5) Let cool, then slice, serve, and enjoy!

Subscribe to:
Posts (Atom)